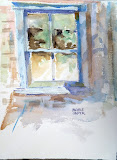
Original Watercolor
10"x14"
Winter gives us new appreciation for the subject of windows: Inside, looking out, outside looking in, used as a frame for a subject in front of the window, using reflections to complete the composition, etc. The choices are limitless.
What inspiration for a painting does your window provide?
Friday, December 31, 2010
Tuesday, December 28, 2010
A Window
Sunday, December 26, 2010
Saturday, December 25, 2010
HaleIwa shore
Thursday, December 23, 2010
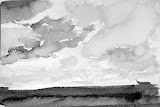
Makapu sky
Tuesday, December 21, 2010
NW Rainy Season
Sunday, December 19, 2010
Connemarra Coast
Friday, December 17, 2010
Gloria's Blue Tea Kettle
Original Watercolor
14"x10"
This charming blue tea kettle sat on Gloria's wood stove. I thought it was as charming, warm and welcoming as Gloria herself. She invited my whole class to come over and paint in her home.
So I set up my portable easel in the family room to demonstrate for my students and this is the result.
Wednesday, December 15, 2010
Snow Laden Pines
Tuesday, December 14, 2010
Grace Cornwall's old homestead
Original Plein Air Watercolor
10"x14"
Here's another one from the pile of sketchbooks.
A local author and educator, Grace Cornwall invited us to paint on her property at Elger Bay (she made sure we knew it had originally been called Algiers Bay).
Although she passed away a few years ago, I still think of her. She had a great intellect, engaging personality and amazing history. Thanks again, Grace, for your inspiration.
Wednesday, December 1, 2010
Birches in Snow
Tuesday, November 30, 2010
Tuesday, November 23, 2010
A Walk in the Snow
Monday, November 22, 2010
Snowing
Sunday, November 21, 2010
Watercolor Greeting Cards
Here is a fun way to practice painting in watercolor. Make a series of greeting cards.
1.Divide a half sheet (15"x22") of 140# watercolor paper with 1" tape into 4 sections (7x10" each) as shown. When cut and folded, each one becomes a 5x7" card. For a horizontal card, position the paper so the deckel edge is down, making a nice border accent on the front of the card. Mark across the fold line 5" up with a light pencil line.
2. Paint the sky with a wash of Cobalt Blue and Cobalt Violet. Add a tiny bit of Raw Sienna if the color is too bright. Use a 1" flat brush for this to avoid too many small brushstrokes. While the sky wash dries, wet the entire snow field with clear water. Be careful to leave a verrrrry thin edge of dry paper between the ground and the sky so the first wash doesn't bleed into the foreground. As the sheen goes off the clear, wet paper, paint the vertical snow shadows under the areas where the barns and trees will be. The timing has to be just right. Use the same color mixture as the sky, but slightly thicker paint. The soft edge, wet in wet, gets the desired soft, blurred shadow edge that says "snow". While you allow this to dry, you can repeat these steps on all the other card sections of your paper. By the time you get back to the first one, it will probably be dry enough to paint the barns.
3. Use a 1/4" flat brush or #8 round brush and thicker paint to make the barn shapes on dry paper. A hair dryer can be used to ensure that the paper is completely dry before you do this. Mix Burnt Sienna and Alizarin Crimson for the barns. This should be about the thickness of heavy cream. Stroke this color from left to right about 2/3 of the way across each barn shape. Quickly rinse and reload your brush with the same thickness of Raw Sienna. Now paint from right to left, completing the barn shape. As this last brushload of Raw Sienna just arely touches the damp, red paint, they will merge. Repeat this step on all your other cards. Allow everything to dry before you start the trees.
4. Trees and more snow shadows.
Trees: Use a #3 rigger or script liner brush. Mix Fr. Ultramarine Blue or Cobalt Blue and Burnt Sienna for the dark base of the trees. Thicker paint creates darker tones. Dilute it with water for the lighter limbs and branches. Wet and squeeze out the water from a natural sponge. You need one with lots of texture to create the dead leaves and fine twigs in the canopy of the trees. Tap the sponge into the remaining trunk color in your palette, then tap in the tree tops. Create as much variety as you can without overdoing it. Work around the group of cards, allowing a bit of drying time between applications. You can make fine textured dots by spattering with a toothbrush, too. Make sure you protect the rest of the painting with paper towels where you don't want spatter.
More Snow Shadows: Make sure everything is dry. Use clear water and a 1" flat brush to carefully rewet all the snow. Use more of the sky mixture, plus a bit more Cobalt Blue to lay in the contour shadows of the hillside, wet in wet.
5. Cut and fold. Make sure everything is bone dry. Use scissors or a paper cutter to cut the cards out along the inside borders of the tape. Fold in half. There you have it: your own series of hand painted watercolor greeting cards!
Note: Each one will be slightly different as you move from one to the next, changing a little here, getting more confidence there.
Labels:
greeting cards,
painting tutorial,
tutorial,
watercolor
Saturday, November 20, 2010
New Snow on the Hills
Thursday, November 18, 2010
Winner of Class Drawing
Class Demonstration
Original Watercolor 5"x7"
Bonnie O. won this demonstration painting in class last night.
I had 4 examples of using the skills learned this fall quarter to make small 5x7" paintings or greeting cards. It's a fun way to practice and become more comfortable with the medium of watercolor.
Original Watercolor 5"x7"
Bonnie O. won this demonstration painting in class last night.
I had 4 examples of using the skills learned this fall quarter to make small 5x7" paintings or greeting cards. It's a fun way to practice and become more comfortable with the medium of watercolor.
Friday, October 22, 2010
Color Blobs and Silhouettes
Here's a fun exercise in learning the two common identifiers of any object: shape, or silhouette, and color.
First use your watercolors to paint a nice big juicy color blob. Use warm, cool, light and dark color. While that's drying, use a separate sheet of copy paper and draw and cut out single or multiple shapes of pears, apples, vases, people, etc.
Now, move your "template" over different areas of the color blob for surprisingly luscious watercolors of pears, or apples, vases, etc.
Both these "pears" are from the same color blob above. Cut a string of "paper dolls" out of a sheet of paper and use the empty template for a fiesta of figures!
You can trace the shapes you like with a pencil, then cut them out and paste them onto a blank greeting card. If you want to use the same color blob with various silhouettes, just scan or photograph each time you change the placement and use the photos for greeting card images.
Saturday, September 4, 2010
Demo from France
Going for Green
Going for Green Original Watercolor en Plein Air Size of artwork 11"x15" Framed & matted 16"x20"
Painted on location during the 5th Annual US Open Plein Air Event on Whidbey Island. If it hasn't sold yet, you may see it this weekend and other work from the event on display until September 15. They'll be closed on Monday for Labor Day, but open on Tuesday. For more information please go to http://www.pacificnorthwestartschool.com/events.html
See my post about this experience en plein air. https://michelecooper.blogspot.com/2010/08/perils-of-plein-air.html
The title has a double meaning.
1. It refers to the variations of color in the landscape.
2.“Going for Green” refers to the jersey won in cycling competitions.
The green jersey, or maillot vert, is worn by the rider that has accrued the most points during the race. Points are awarded based on the positions that riders finish each stage as well as their performance during intermediate sprints within stages.
Friday, September 3, 2010
Hollyhocks with a View
15"x11" Original Watercolor
Framed size: 20"x16"
Another plein air piece from Whidbey Island.
Out of the ordinary for me to return for a second day on plein air work, but I was coming down with a sore throat and feeling low on energy. After the second day, the weather changed and rain, cold wind, etc. put me indoors for the next morning. Got the framing done, though!
Wednesday, August 25, 2010
Perils of Plein Air
There is no such thing as the unhampered artist. I know, I've been there.....hundreds of times!
Just when you think the light is perfect, the viewpoint solves most of your compositional problems and you're ready for the final 5 strokes.........the biggest, yellowest school bus comes and parks right in front of your easel!
I did have a memorable experience here though. Earlier in the day, I was about 2/3 finished with the painting when I became aware of someone standing behind me. A very polite voice said, "Your colors are so beautiful! May I take a photo of you and your work?"
I thought I recognized her, asked her if her name was Anne and realized we had met the year before while I was painting "Down Holbrook". Anne is a poet who lives on Whidbey Island. I told her I needed help with a title and she came up with a great one: "Going for Green."
I'll post a better photo of this painting for you later.
Update: Here’s the finished painting https://michelecooper.blogspot.com/2010/09/going-for-green.html
Friday, August 20, 2010
Artist a Day Demonstration
French Vineyard
Original Watercolor
20x16
Auction closes on Sept 25 at Bellevue Art & Frame (new store location)
This is the painting that I did in four hours in person on August 19.
It is available for purchase by silent auction and proceeds benefit Bellevue Schools Foundation. For more information and to see the other paintings in this exhibit, go to http://www.bellevueartandframe.com/events_4gallery.html
Friday, July 30, 2010
Mother's Pansies
Wednesday, July 21, 2010
An Artist a Day
An Artist a Day at Bellevue Art & Frame
August 19, 2010
Noon -4pm
Artist in Action, Michele Cooper
Come and see me paint on August 19 at Bellevue Art & Frame's new store!
Every day in August, between noon.and 4 P.M., a different artist will create a painting, drawing, collage, or print in the medium of his or her choice. Artists will work in the art department. The public is invited to drop in each day to watch as artists create their paintings and drawings. As each piece is finished, the canvases will be returned to their place in the gallery. Bid sheets will accompany each art piece. The public may bid on works by silent auction from August 1 through September 25th.
All funds will benefit the Bellevue Schools Foundation.
Here's how you can help: I have all sorts of ideas of what I should paint and what would be the best subject for an auction like this. Got any ideas? For examples, you can visit my gallery of work on my website at http://michelecooper.com/gallery.html
Please send me your comments and suggestions and I will post them here until August 18.
Sunday, July 11, 2010
One week left until end of show
“BRUSHES with the Land” Opens June 18th
Only one week left to see a very strong landscape show! Sorry, I have no image of my artwork in the show. If any of you have been there, let me know what you think.
The 4th annual “BRUSHES with the Land” show runs June 18 through July 18 and features a wide range of Northwest Landscapes by 42 artists from Washington and Oregon. I have been selected as one of the participating artists.
Also, there's an opportunity to paint at my two workshops next weekend. See more information at: http://michelecooper.com/workshops.html
Wednesday, June 16, 2010
Opening Reception Friday
Brushes with the Land
June 18th, 2010 (Friday)
Michele's work has been chosen for this juried exhibition. The 4th annual “BRUSHES with the Land” show runs June 18 through July 18 and features a wide range of Northwest Landscapes by 42 artists from Washington and Oregon.
June 18th, 2010 (Friday)
Michele's work has been chosen for this juried exhibition. The 4th annual “BRUSHES with the Land” show runs June 18 through July 18 and features a wide range of Northwest Landscapes by 42 artists from Washington and Oregon.
Please join us for the Opening Reception on Friday, June 18th, from 5 pm to 8 pm.
Saturday, June 12, 2010
Sketch Corrections
Thursday, June 10, 2010
Value Problems
Thursday, May 27, 2010
Into the Light
Along the Muddy Banks
Saturday, May 15, 2010
Plein Air at Palmer Lake
Clouds gathering at Split Rock
Original Watercolor
While my family was out on the lake fishing, I painted this at Split Rock day park.
Good thing I had the keys to the car, because it only took a short while for a big squall to come in with high winds and lots of rain. Thirty minutes later, it was partly sunny again, but still very cold.
Monday, May 3, 2010
Youthnet - An Evening of Art & Jazz
"Grapes & Shadows"
Original Watercolor
Framed size 11"x14"
I did a series of these small studies of grapes and shadows. One like this is in the exhibit for Youthnet-An Evening of Art & Jazz. See more great art on Friday, May 7. Proceeds go to a good cause.
The event starts at 5:00 p.m. at the Youthnet building and is a fun way to end a work week with gourmet appetizers, beverage of choice and wonderful jazz and art --- all for only $10. See my Events page at www.michelecooper.com for more information.
Thursday, April 29, 2010
Hot Coffee
Original Watercolor
from a journal
I painted this enameled coffee cup as part of an entry in a journal. All portraits aren't faces.
If this was a portrait of someone you know, how would you say it expressed that person's personality?
from a journal
I painted this enameled coffee cup as part of an entry in a journal. All portraits aren't faces.
If this was a portrait of someone you know, how would you say it expressed that person's personality?
Labels:
Coffee,
cup,
enamel coffee cup,
food and beverage,
hot coffee,
watercolor
Thursday, April 22, 2010
New DVD release-Watercolor Koi
Step by Step 20 minute lesson on DVD
Here's a first look at the cover of my new art instructional DVD, "Watercolor Koi."
Release date: April 22, 2010
The cover art is the demonstration painting in the lesson. One simple project, step by step.
Learn how to simplify the drawing, make your koi look round and three dimensional, drop in colorful patterns and use some special effects for the watery depths. There are lots of video and photo references so that you, too, can create dozens of your own watercolor koi.
Price: $20.00 for one DVD plus $5.00 S&H
Labels:
how to koi,
koi drawing,
koi dvd,
koi tutorial,
watercolor koi
Friday, April 16, 2010
Water Ripples and Lotus Sway
I found just the perfect inspiration for my students this week. Relax, enjoy, get ready to paint koi.
Please click on the image to see full size in Youtube.
Saturday, April 10, 2010
Cumulus Study
Friday, April 2, 2010
Adding Figures
Saturday, March 27, 2010
Travel Palette
I came across this great little travel palette while randomly browsing art supplies today.
It's only 1/2" x 2 3/8" x 3 3/16". You can fill it with your own choice of 12 colors and it has a thumb ring on the bottom. This would easily slip into a zip-loc bag to make it travel proof. I think it would work great with Daniel Smith's new Grab & Go Watercolor Travel Set.
Get it at Wet Paint online and be ready to paint outdoors this spring! (or in your car if you live in the great wet Pacific NW--we still count that as being outdoors.)
Thursday, March 11, 2010
Glazed Garlic
Tuesday, February 2, 2010
Back from the South Pacific
Aloha! Sorry about the long absence.....we were in the South Pacific, getting to know our newest granddaughter.
I love to paint, I love Hawaii, but I love our sweet little granddaughter more. So all our time was spent getting to know her and catching up on family time.
Here's a page from my sketchbook....painted on one of the world's most beautiful beaches.
I love to paint, I love Hawaii, but I love our sweet little granddaughter more. So all our time was spent getting to know her and catching up on family time.
Here's a page from my sketchbook....painted on one of the world's most beautiful beaches.
Subscribe to:
Posts (Atom)